


Today we thought we’d share with you guys an easy and clear, step-by-step method of starting your own food blog! Back before we started Couple Eats Food, we were so overwhelmed and confused by all the information you can find online about starting a blog. It was hard for us to filter all the information we get and figure out the best and easiest way for us to start our food blog. So that’s why we decided to write a post dedicated entirely to guide you in the blog-making process and to lay out the steps for you clearly so that your website or blog can be up and running in no time! So if you’re interested in starting your own food blog or any kind of blog for that matter, this post is for you! Let’s go!
Please note that this post contains affiliate links. However, we do only recommend products and applications that we have used ourselves and that we truly love.
Step 1: Find your domain name
So obviously, your blog has to have a name and a matching domain name. What’s the difference between a website name and a domain name? A website name is the title of your website, the name that you will see on the browser tab. A domain name is the name that will appear in your website’s URL. So for example, our blog name is Couple Eats Food, and our domain name is www.coupleeatsfood.com.
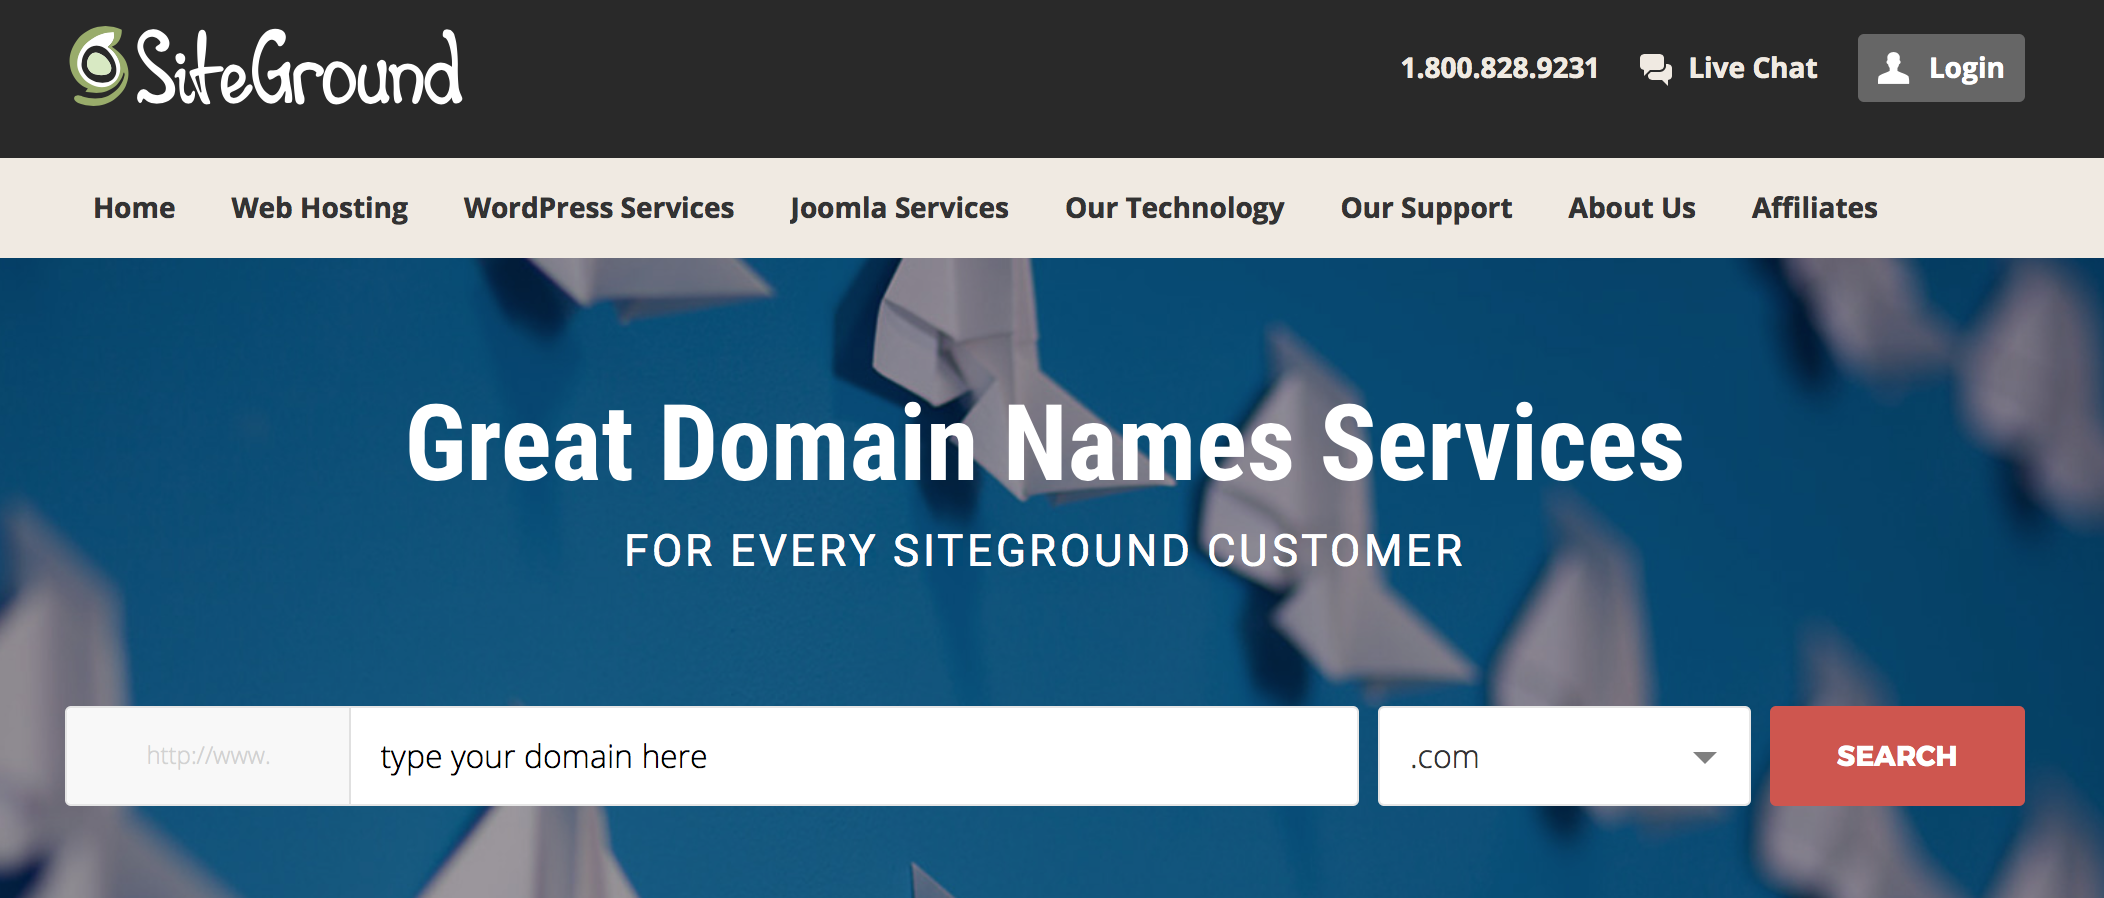
We suggest that you find a blog name and a matching domain name so that your blog stays consistent. If your blog title and your domain name is different, it could get kinda confusing for your readers! And since there are already so many other websites out there, you have to make sure that the the domain name that you chose is available. How to find out your domain name is available? You can head on to Siteground’s website and check if the domain name you chose is available.
Step 2: Find a host for your website
You got your domain name and you’re feeling excited! Now it’s time for you to find a host for your food blog. What is a website host? Think of the internet as a huge apartment building. The web host is like the landlord and you’re a tenant looking to rent a space to house your website. Now, on to the important question. How to find a good website host? We use Siteground as our web host since they have great prices, very secure, and have amazing technical support (especially for the technically-challenged people like us, it comes in pretty handy).
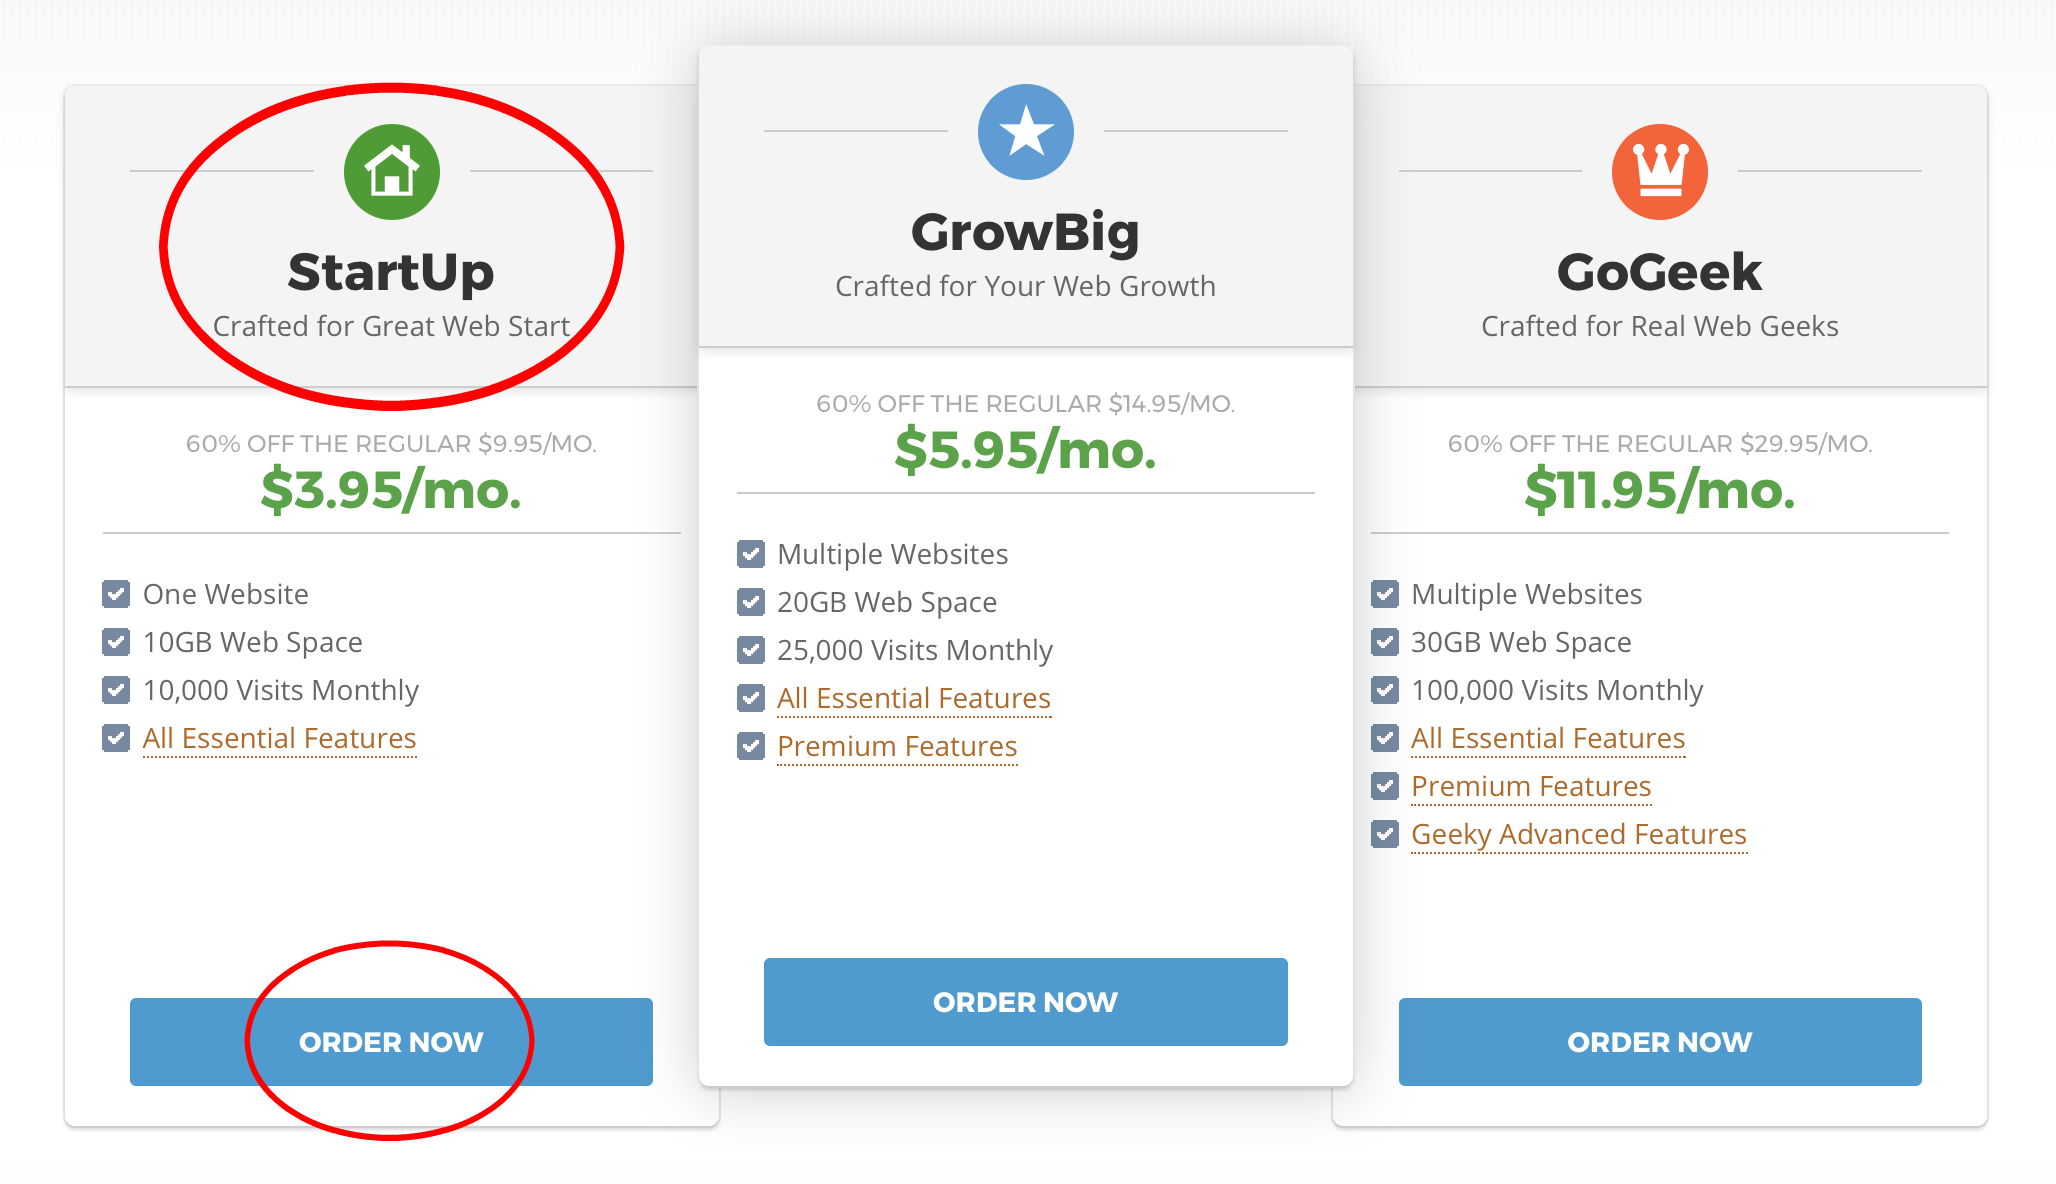
You can just head on to Siteground’s website and pick the plan that you want. We suggest the Web Hosting StartUp plan for now since it is a new blog and well, it's the cheapest one! But once your blog grows and you get more traffic, we do suggest you upgrade to a plan that is more suitable to your needs. But for now, the StartUp Plan will definitely do!
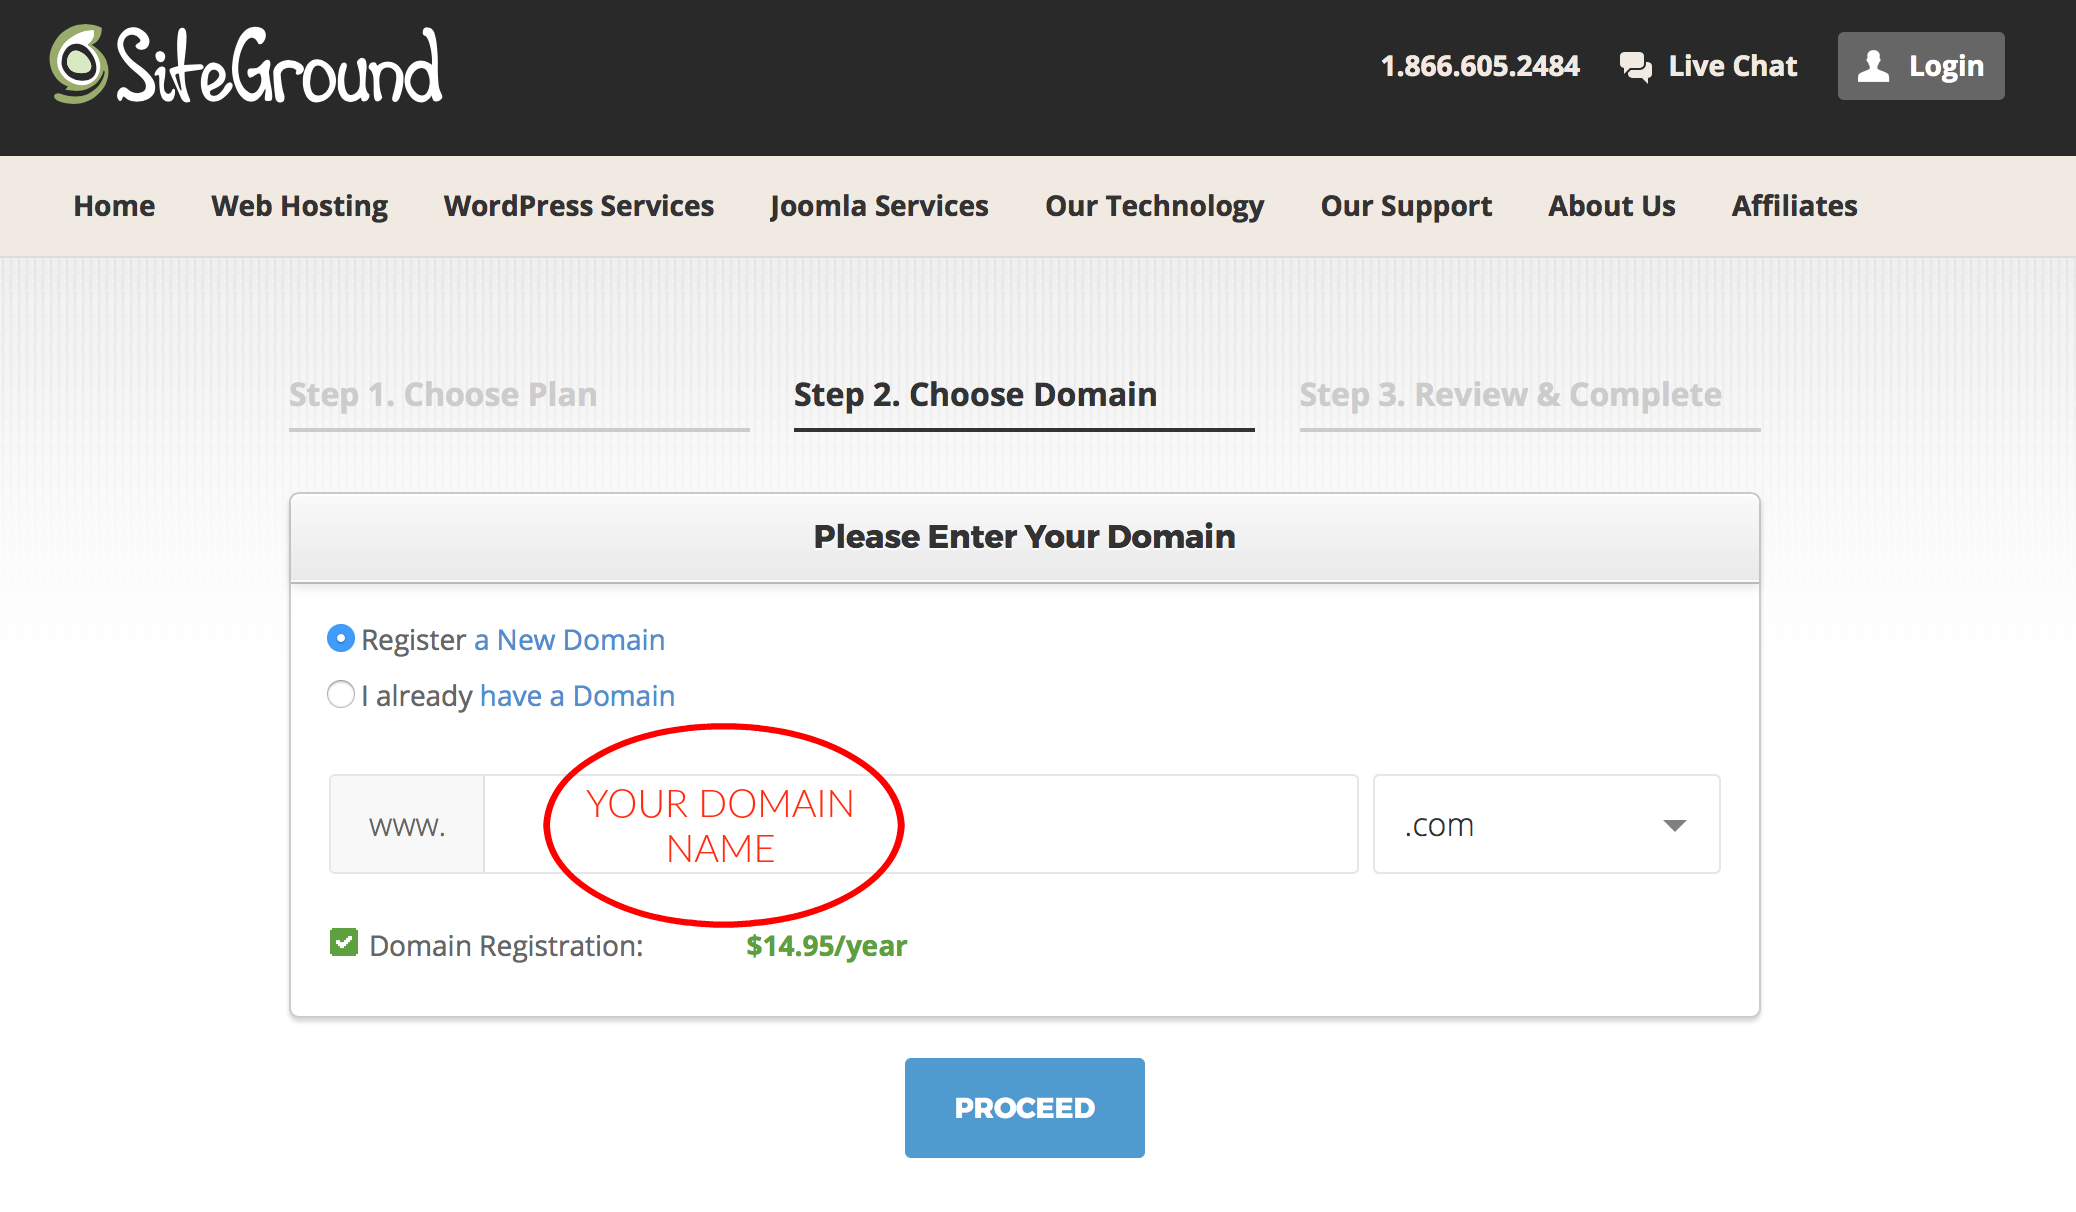
Click "Order Now" for the StartUp Plan, and it will direct you to a page to register the domain name that you already chose in Step 1. Select "Register a New Domain" and you can go ahead and type in the domain name that you chose in the case provided. You can also choose whether you want your website to be .com, .net, .org, etc. Some are cheaper to register than others, but we do suggest you choose .com since it is the most professional-looking and the most common one. Once you are done, click on "Proceed"!
You will be directed to a page where you'll be asked to provide some information for your account and for the payment and purchase.
The price stated in the beginning is the monthly price, but the purchase price will be a lump sum for the hosting price for one whole year plus the domain name registration. So you’ll just have to pay once for the whole year and not have to worry about the payments each month!
Once you have provided the account and payment information, select the Terms of Services agreement box and click on "Pay Now". And your website is officially registered and online! You'll just have to follow the instructions that Siteground will provide you to access your account!
Step 3: Install WordPress on your website
So now that you have your domain name and that your website host, it's time to make your blog look just like how you envisioned it to be! Now, unless you are a university graduate in a computer program and you know HTML and CSS coding, you need to install WordPress to build your blog. WordPress is basically a software that allows you to do this without having to deal with all the coding part of it. So again, for all you technology noobs like us, it comes in veryyy handy. How to install WordPress using through Siteground? Thankfully, t's easy and you only need to click a few buttons, so let's get to it!
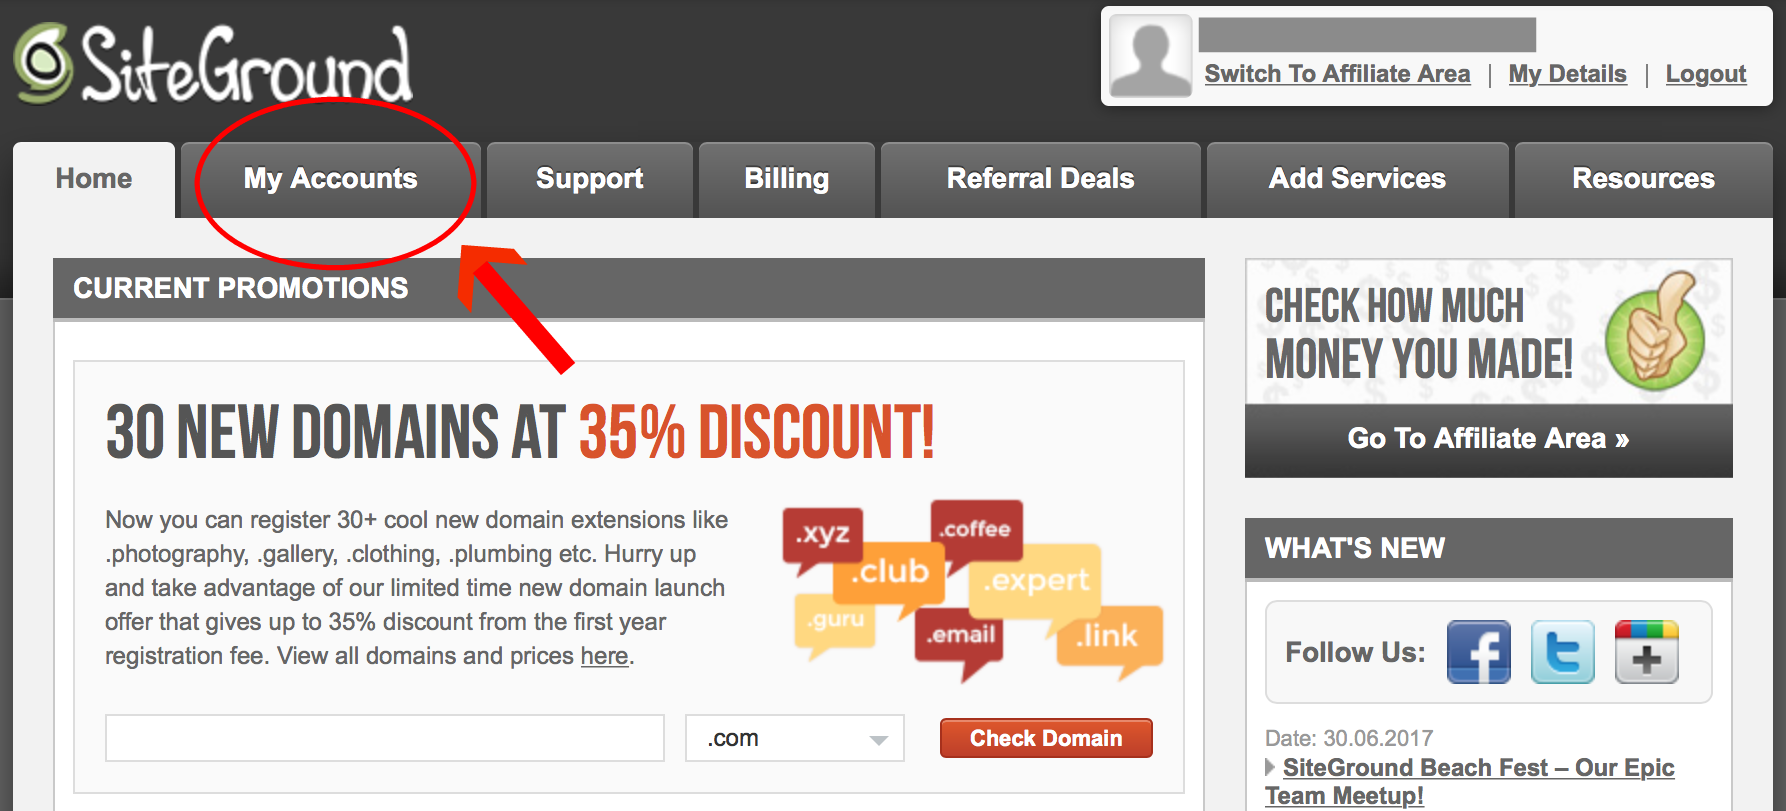
First you need to do is log in to your Siteground account using the login information that you chose during the sign up process, and head on to the “My Accounts” section.
In the "My Accounts" section, click on the "Go to cPanel" button.

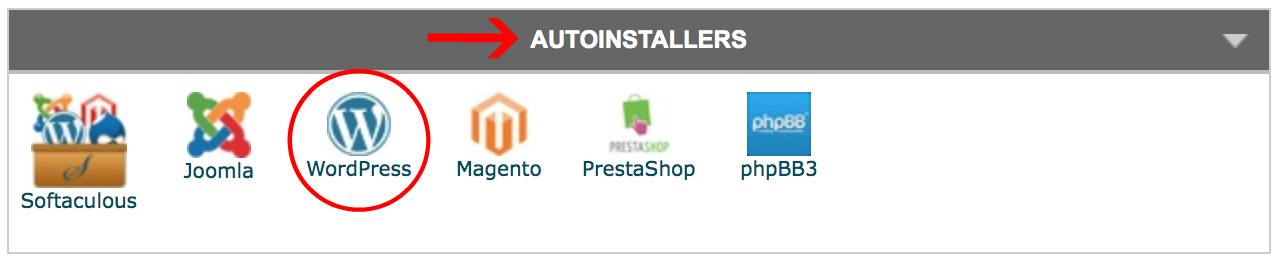
When you are in the cPanel, in the AutoInstallers section, click on the WordPress icon.
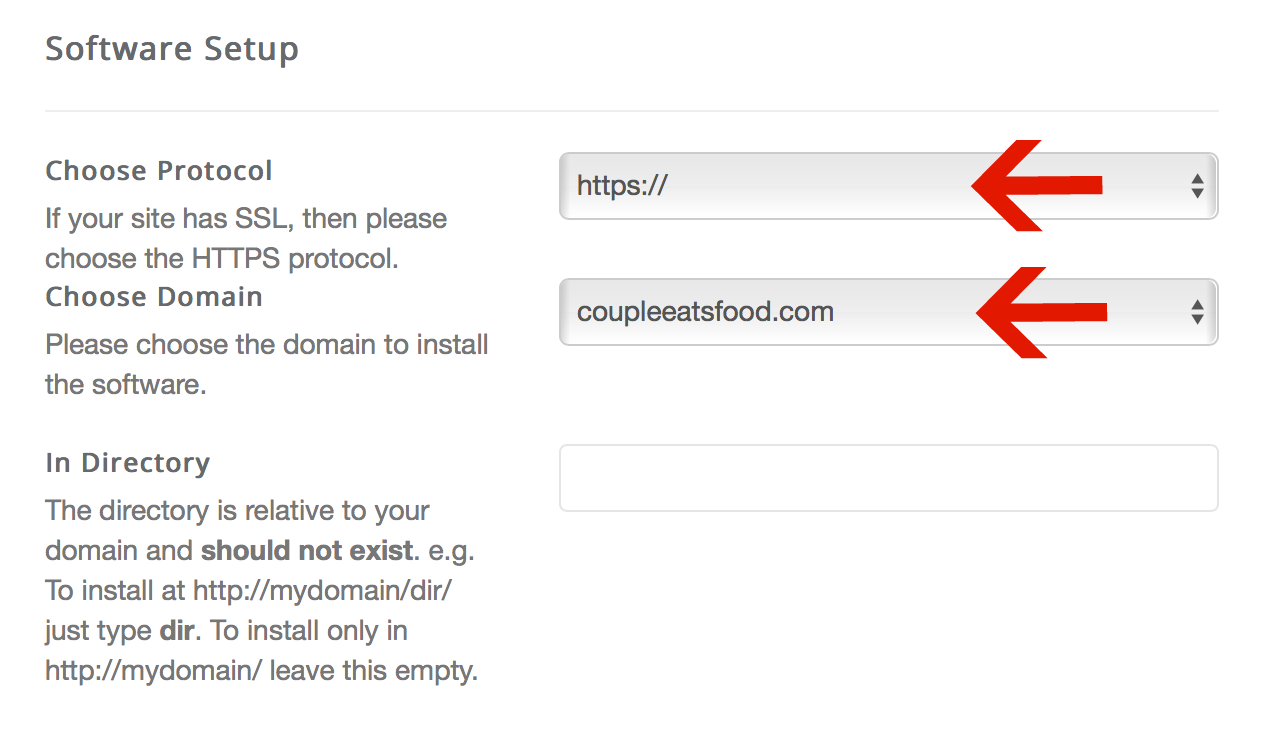
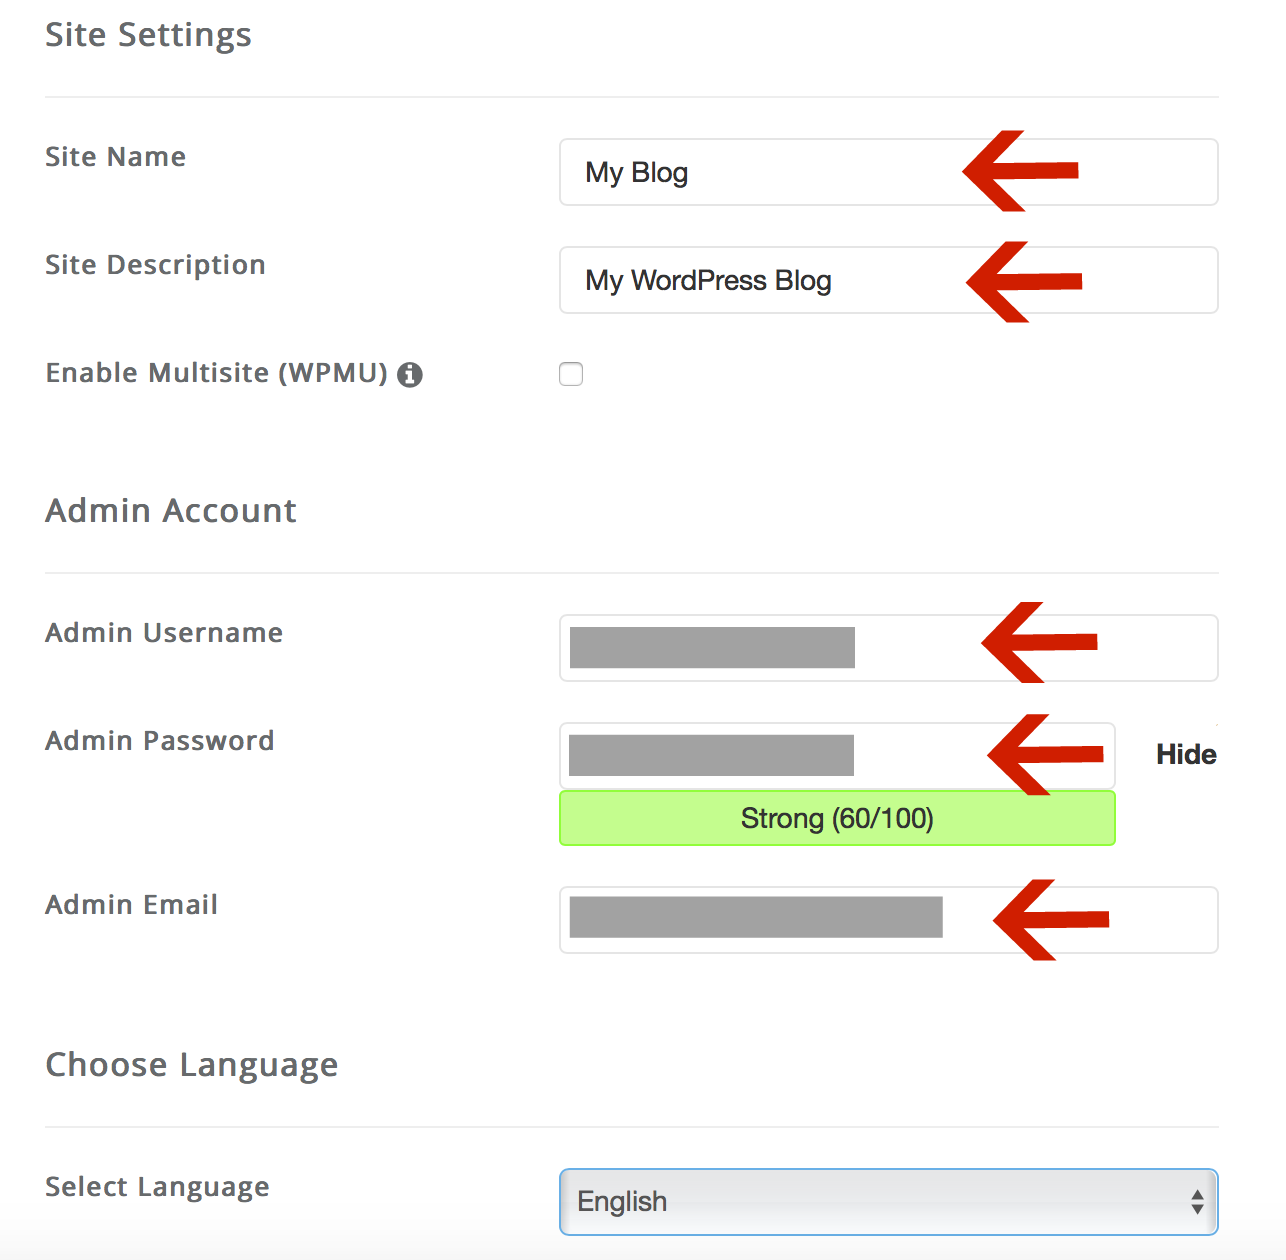
Then go ahead and click on the "Install" button. You will need to specify a couple of things to proceed with the installation. In the "Software Setup" section, choose "https://" for the Protocol and choose the domain you wish to install WordPress in for Domain. You can just leave the In Directory field blank. In the "Site Settings" section, it's important to edit the Site Name and Site Description as these elements are essential in Search Engines. In the "Admin Account" section, make sure to change the username and password to something that you will remember but also secure, since you will be using these informations to log in your WordPress account to edit your blog. Also, make sure that the email address provided is valid. You also have an option to install WordPress in other languages other than English.
Once you are done filling out all the necessary fields, go ahead and click on "Install" at the bottom of the page. You will see a success message telling you that WordPress was successfully installed on your website. They will also provide you with an Administrative URL that is important for you to keep. It is through this URL that you will be able to log in to your WordPress account using your admin information and edit your blog. You'll notice that the Administrative URL is just your domain name plus "/wp-admin/", so if you ever forget the URL you'll know what to type!
There you are guys! You have successfully created your very own blog/website! The next step is to write your blog posts and to build your website using WordPress with one of their free themes or by buying one on Theme Forest. We'll walk you through the details on WordPress usage and customization on one of our upcoming blog posts!
Hope this post clarifies the whole mystery behind creating your own food blog and helped you to finally start your own website! Happy blogging!
P.S. if you're wondering what those delicious-looking noodles are on the main picture of this blog post, it's our Asian Cold Noodle Salad with Sesame Peanut Dressing!
Leave a Reply